|
WildFire Storage Server
for DSSv7 - Quick Start
This is a quick guide to installing Open-ESS for
users that are used to Open-E installations.
If you are starting with a new system:
Download the Open-E DSSv7 installer ISO image from
this link:
ess-dssv7_21661-170421_70602-170525.iso
If you have early version of ESS for DSSv7
installed:
The above ISO file actually consists of a base DSSv7
install plus as update. You can access the files
seperately here. This is useful if you already have ESS
/ DSSv7 installed and want to just update the upgrade
package.
dssv7_21661-170421.iso
ess-dssv7_21661-170421_70602-170525.upd
If you are an OEM and need to spin your own
ISO:
You can start with the above packages and create your
own ISO with your updates already in place. This
involves:
Once the base ESS update is in place, you need to
load the actual ESS software.
Extract the ISO to a directory.
Add your updates to the "b#####/modules" directory.
Use the "make_iso.exe" file to build a new ISO
image.
Internet Access Required:
The ESS base package is just a small "downloader"
tool. The actual software is downloaded across the
Internet. This requires that your server have an active
internet connection. You will need to configure your
primary DSSv7 network connection to have a valid IP
gateway address. You will also need to configure a valid
IP address for a DNS server.
You can disconnect your DSSv7 from the Internet after
ESS is updated.
Console Screen Shots:
|
DSSv7 Home
Screen:

|
|
<ctrl> <alt >W:
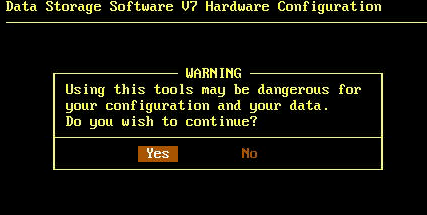
Hardware Configuration:
ESS Array Configuration
Functions are all accessible on the text console
from the "Hardware Configuration Tools" menu.
Press <ctrl><alt>W to access this menu.


|
|
ESS "updater"
screen:
The ESS software that is
includes on the ISO is a "software installer".
The actual ESS software must be downlaoded over
the internet. If you have a system that
has security requirements prohibiting an
internet connection, you can remove the internet
connection after the ESS software package has
been updated.

|
|
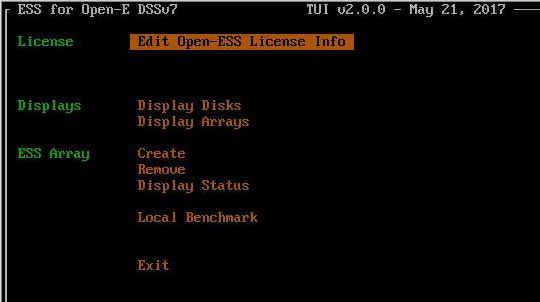
ESS main menu:
Once the ESS update has
been downloaded, you can actually configured the
ESS SSD RAID array.
|
|
ESS license entry
The first step is to
enter a WildFire-Storage License. Without
an active license, the ESS array cannot be
created.
Start by getting a
sofware serial number from WildFire-Storage.
You can request a permanent license, or a 60 day
demo. The license also has a "capacity"
field in Gigabytes. Contact
support@wildfire-storage.com for help.


|
|
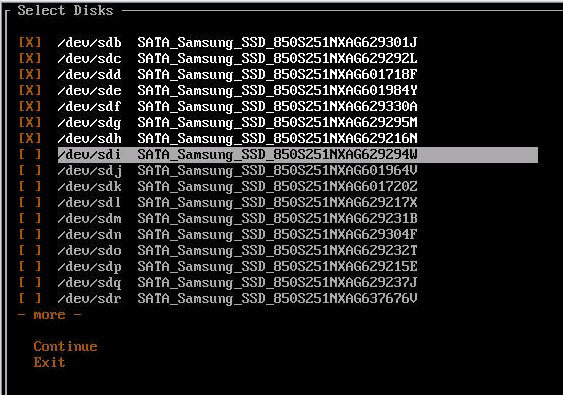
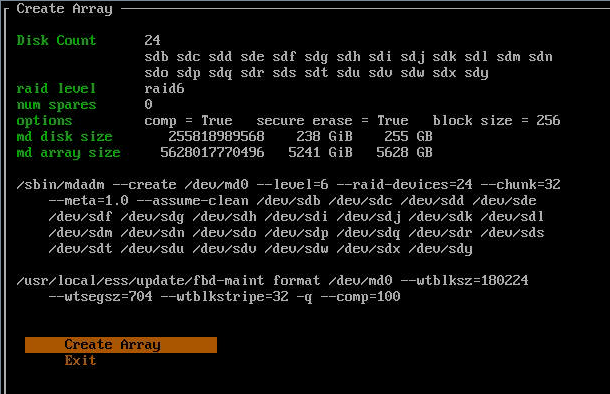
ESS create array:
When you create an ESS
array, you select the installed SSD, RAID level,
and other parameters for the all Flash array.
Most of these parameters
are pretty self explanatory. If you have
any questions, contact
support@wildfire-storage.com
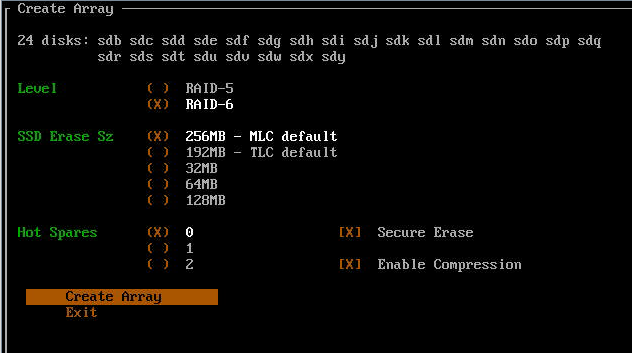

Once the array is
created, you can switch over to the web-based
DSSv7 admin screen. The ESS array should
be available for you to create a volume group
on. From this point on, the system is
managed from the DSSv7 web console.
|
|
